
20-Minute Healthy Teriyaki Chicken Stir Fry (Weeknight Dinner That Tastes Better Than Takeout)

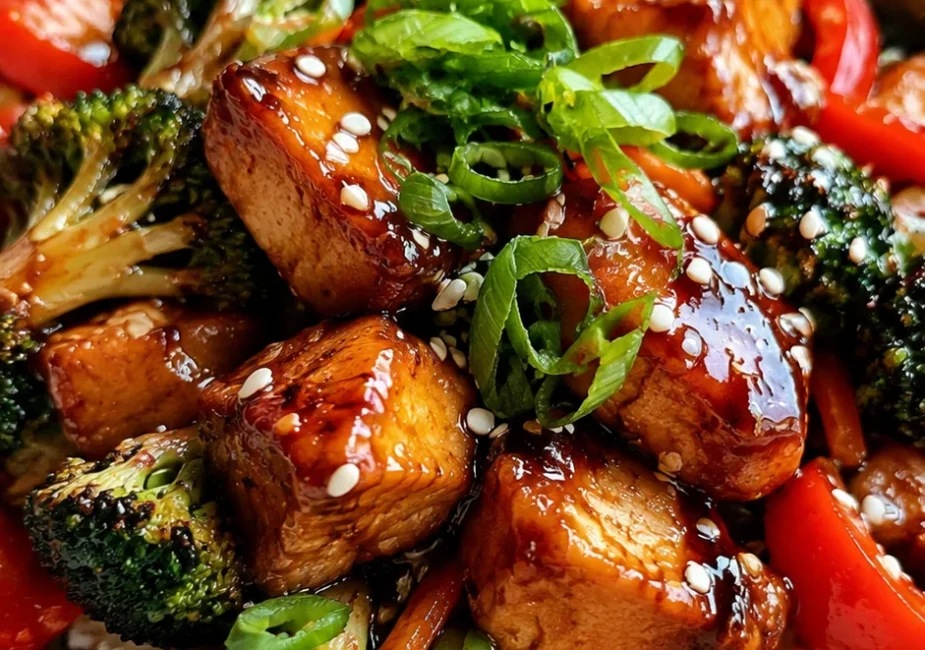
If you’re craving sticky-sweet teriyaki flavor without the heavy restaurant grease or long wait, this skillet dinner delivers. Tender chicken, crisp vegetables, and a glossy homemade sauce come together fast for busy nights when you still want something that looks and tastes special.
This 20-minute healthy teriyaki chicken stir fry balances savory, slightly sweet, and bright notes in every bite. The chicken stays juicy, the veggies keep their crunch, and the sauce clings perfectly. It works for family dinners, meal prep, or a quick solo plate that feels satisfying.
Quick Recipe Snapshot
- Prep Time: 8 minutes
- Cook Time: 12 minutes
- Total Time: 20 minutes
- Servings: 4
- Difficulty: Easy
- Best For: Busy weeknights, meal prep, beginners
- Main Flavor Notes: Sweet-savory teriyaki, garlic-ginger warmth, fresh vegetable crunch
Why You’ll Love This 20-Minute Healthy Teriyaki Chicken Stir Fry
- Fast and realistic for real life. Everything cooks in one pan in about 20 minutes, so dinner hits the table before anyone gets hangry.
- Better texture than takeout. The chicken stays tender while the vegetables stay crisp-tender instead of soggy.
- Sauce that actually sticks. A quick cornstarch slurry creates that shiny, clingy glaze without bottled additives.
- Family-friendly and flexible. Mild enough for kids yet easy to spice up for adults.
- Pinterest-pretty results. Colorful peppers, glossy sauce, and green onions make it look as good as it tastes.
What Is 20-Minute Healthy Teriyaki Chicken Stir Fry?
This is a streamlined version of the classic stir-fry: bite-sized chicken cooked quickly over high heat, then tossed with colorful vegetables and a simple teriyaki-style sauce. The sauce is made from pantry staples—soy sauce, a touch of honey or maple, garlic, and ginger—so it tastes fresh rather than overly sweet or salty.
The method keeps the chicken juicy and the vegetables bright. High heat and short cooking time lock in flavor while the cornstarch thickens the sauce into a glossy coating. It is approachable for beginners yet reliable enough for anyone who wants a solid weeknight dinner without complicated steps.
Recipe Inspiration
Teriyaki refers to a Japanese cooking method that involves grilling or broiling food glazed with a soy-based sauce. The name comes from “teri” (shine) and “yaki” (grill). Home versions often adapt the idea into a quick stir-fry with chicken and vegetables. This recipe draws inspiration from that glossy, sweet-savory profile while keeping ingredients accessible and the process realistic for a busy kitchen. It is not traditional yakitori or restaurant-style teriyaki, but it captures the same appealing balance of flavor and shine in a one-pan format.
Ingredients You’ll Need
Main Base
- 1½ pounds boneless skinless chicken breasts or thighs, cut into 1-inch pieces: Thighs stay juicier; breasts work well if not overcooked.
- 1 tablespoon avocado oil or neutral high-heat oil: Handles the high heat needed for a good sear without smoking.
- 1 red bell pepper, sliced into thin strips: Adds sweetness and bright color.
- 1 cup broccoli florets (about 1 small head): Provides crunch and soaks up sauce.
- 1 cup snap peas or snow peas: Keeps a fresh snap and light green color.
- 2 green onions, sliced (white and green parts separated): Whites go in early for flavor; greens finish the dish.
Sauce
- ⅓ cup low-sodium soy sauce or tamari: Forms the savory base without excess salt.
- 3 tablespoons honey or pure maple syrup: Balances the soy with gentle sweetness.
- 2 tablespoons rice vinegar: Brightens the sauce so it does not taste heavy.
- 1 tablespoon fresh grated ginger (or 1 teaspoon ground): Adds warm, aromatic depth.
- 3 garlic cloves, minced: Builds savory backbone.
- 1 tablespoon cornstarch mixed with 2 tablespoons cold water: Creates the glossy, clingy texture.
- 1 teaspoon toasted sesame oil (optional but recommended): Finishes with nutty aroma.
Garnish
- 1 tablespoon toasted sesame seeds
- Extra sliced green onion tops
- Optional red pepper flakes for heat
How to Make 20-Minute Healthy Teriyaki Chicken Stir Fry
Prep the ingredients first. Cut the chicken into even 1-inch pieces so it cooks at the same rate. Slice the vegetables and whisk the sauce ingredients (except the cornstarch slurry) in a small bowl. Having everything ready keeps the cooking time short and prevents overcooking.
Sear the chicken. Heat the oil in a large skillet or wok over medium-high heat until it shimmers. Add the chicken in a single layer. Let it sit undisturbed for 2–3 minutes until the bottom turns golden. Stir and cook another 3–4 minutes until mostly cooked through and no longer pink in the center. Transfer the chicken to a plate.
Cook the vegetables. In the same pan, add the broccoli, bell pepper, snap peas, and the white parts of the green onions. Stir-fry 3–4 minutes until the broccoli turns bright green and the peppers soften slightly but still hold their shape. The vegetables should stay crisp-tender.
Bring it together. Return the chicken to the pan. Pour in the sauce and stir to coat everything. Add the cornstarch slurry and cook 1–2 minutes, stirring constantly, until the sauce thickens and turns glossy. It should coat the back of a spoon and cling to the chicken and vegetables.
Finish and serve. Remove from heat. Stir in the sesame oil if using. Taste and adjust with a splash more soy or a pinch of honey if needed. Sprinkle with sesame seeds and the green onion tops. Serve immediately over rice or noodles.
The Simple Cooking Science Behind This Recipe
High heat and a short cooking window are the keys to good stir-fry texture. When the pan is hot enough, the chicken develops a light golden crust that locks in juices. Crowding the pan lowers the temperature and causes steaming instead of searing, which leads to pale, watery meat.
The cornstarch slurry works through starch gelatinization. As the mixture heats, the starch granules absorb liquid and swell, turning the thin sauce into a glossy coating that clings rather than pools at the bottom of the pan. Adding the slurry at the end prevents it from breaking down and keeps the vegetables from turning soft.
Expert Tips for Best Results
- Cut the chicken into uniform pieces so every bite cooks evenly and stays tender.
- Pat the chicken dry before it hits the pan. Excess moisture stops browning.
- Use a large skillet or wok. A crowded pan steams the food instead of searing it.
- Keep the heat medium-high. Too low and the sauce never thickens properly; too high and the garlic can burn.
- Add the cornstarch slurry only after the sauce is already in the pan and hot. This prevents lumps.
- Taste the finished sauce before serving. A small splash of vinegar or honey can fine-tune the balance.
- Have rice or noodles ready before you start cooking so the stir-fry stays hot and glossy when plated.
Easy Variations
- Spicy version: Add 1–2 teaspoons sriracha or a pinch of red pepper flakes to the sauce.
- Vegetarian: Swap chicken for extra-firm tofu, pressed and cubed. Sear it the same way.
- Lighter: Use chicken breast and reduce the honey to 2 tablespoons.
- Extra vegetables: Add sliced mushrooms, zucchini, or carrots in the vegetable step.
- Kid-friendly mild: Skip the ginger if preferred and serve the sauce on the side.
- High-protein: Double the chicken or add a handful of edamame with the vegetables.
What to Serve With 20-Minute Healthy Teriyaki Chicken Stir Fry
- Steamed jasmine or brown rice to soak up the sauce
- Cauliflower rice for a lower-carb plate
- Simple cucumber salad with rice vinegar for contrast
- Steamed or roasted broccoli on the side if you want extra greens
- Quick-cook soba or rice noodles
- Fresh pineapple chunks or mandarin oranges for a bright side
- Lettuce cups for a lighter, hand-held option
How to Store and Reheat
Store leftovers in an airtight container in the refrigerator for up to 3–4 days. The sauce may thicken further as it sits.
Freezing is possible but not ideal. The vegetables lose some of their crisp texture after thawing. If you freeze, cool completely first, then freeze in portions for up to 2 months. Thaw overnight in the fridge.
Reheat gently in a skillet over medium heat with a splash of water or broth to loosen the sauce. Microwave in short bursts, stirring between each, to avoid drying out the chicken. Avoid high heat that can make the chicken rubbery.
Make-ahead tip: Prep the chicken and vegetables up to a day ahead and keep them separate in the fridge. Whisk the sauce and store it in a jar. Cook just before serving for the best texture.
Common Mistakes to Avoid
- Overcrowding the pan: Cook the chicken in batches if needed so it sears instead of steams.
- Adding the slurry too early: Wait until the sauce is hot so it thickens smoothly.
- Overcooking the vegetables: Pull them while they still have a slight bite.
- Using high-sodium soy sauce without adjusting: Low-sodium gives better control over saltiness.
- Skipping the rest after searing: Let the chicken finish cooking in the sauce so it stays tender.
- Letting the finished dish sit too long: Serve promptly while the sauce is still glossy.
Frequently Asked Questions
Can I use chicken thighs instead of breasts?
Yes. Thighs stay juicier and are more forgiving if slightly overcooked. Cut them the same size and cook a minute or two longer if needed.
Is this recipe gluten-free?
Use tamari or certified gluten-free soy sauce and check that your cornstarch is pure. Everything else is naturally gluten-free.
Can I make the sauce ahead?
Yes. Whisk the sauce ingredients (without the slurry) up to 3 days ahead and store in the fridge. Add the slurry only when cooking.
How do I make it less sweet?
Reduce the honey or maple to 2 tablespoons and add an extra splash of rice vinegar for balance.
What if I don’t have fresh ginger?
Use 1 teaspoon ground ginger. The flavor is milder but still works.
Can I cook this in an air fryer?
The chicken and vegetables can be air-fried separately, then tossed with the thickened sauce on the stovetop. It takes a few extra steps but works in a pinch.
20-Minute Healthy Teriyaki Chicken Stir Fry
Last modified: August 28, 2026