There’s a moment between pulling the cake out and setting out the plates where it occurs to you that the cake is finished and there’s nothing going on top of it. Not the version where you bought the butter in advance and had a plan. The pan-is-still-warm, you-have-five-minutes version.
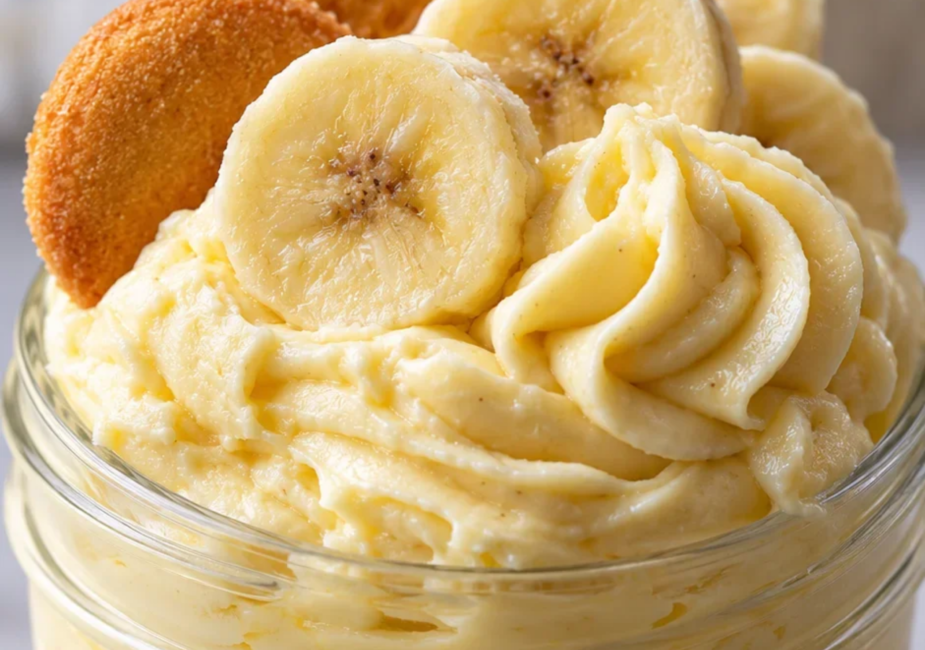
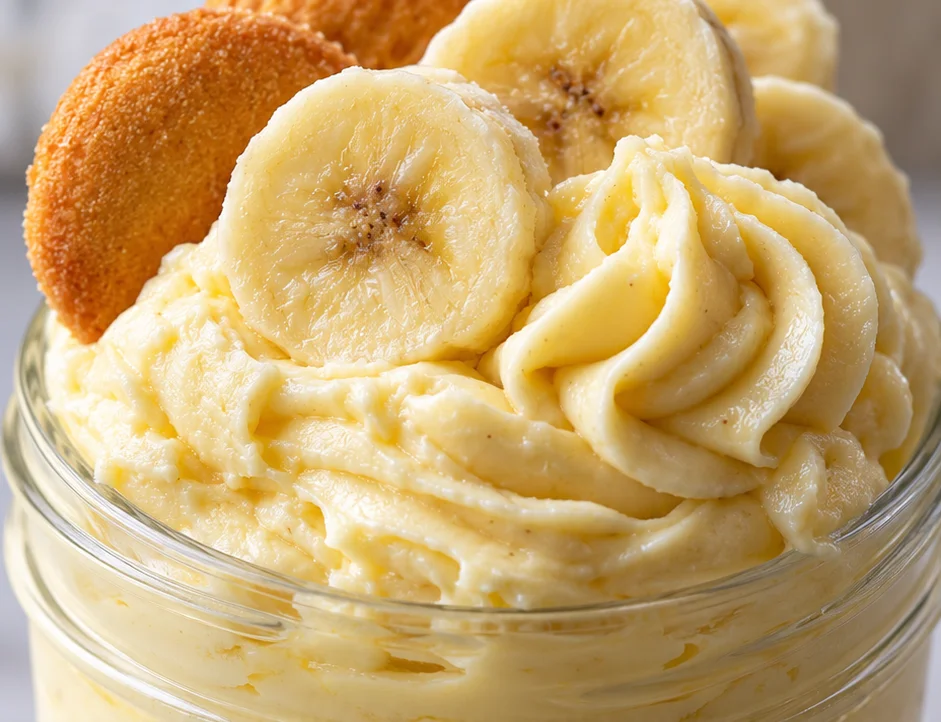
That’s the one this frosting is built for, and it’s better than it has any right to be. The flavor of a boxed banana pudding, the texture of a real frosting — thin enough to pour off a spatula, thick enough to hold a ridge. Here’s how it happens.
Why This Banana Pudding Frosting Works
- Five minutes of actual work, and no heat at all. No baking, no boiling, no waiting for anything to cool. It’s a stand mixer or a hand mixer and a bowl.
- The butter temperature is the entire recipe. Cool butter at 65 to 68°F whips to something light that holds a soft peak for an hour. Warm butter at 72°F looks fine for two minutes and then starts sliding off the cake. Two degrees of difference, completely different result.
- You use a quarter of the box’s liquid. 1/2 cup of water for a mix that normally gets 2 cups, because you’re building frosting stiffness rather than pudding.
- It keeps for five days. Covered in the fridge it stays perfectly usable, and it gets quite firm in there, which is expected.
- It’s real banana flavor, not flavored oil. Instant banana pudding powder is genuinely banana. That’s the whole reason this tastes different from a vanilla powder frosting in a banana-colored tub.
- Naturally gluten-free and vegetarian. Frost a wheat cake, a gluten-free cake, or a pile of brownies. Same bowl either way.
Recipe Card Summary
- Active time: 5 minutes
- Stand time: 10 minutes for the pudding base to set
- Total time: 15 minutes
- Yield: about 3 cups — enough for a 9×13-inch sheet cake or 18 to 20 cupcakes
- Estimated nutrition, per 2 tablespoons: ~150 calories, 24 g carbs, 6 g fat, under 1 g protein — an estimate only, and the honest one. Almost everything here is butter and sugar, and the numbers reflect that rather than dressing it up.
Ingredients
- 1 stick (8 tbsp / 115 g) unsalted butter, cut into 1-inch cubes
- 1 (3.4-oz / 96 g) box instant banana pudding mix
- 1/2 cup (120 ml) cold water
- 1 tsp vanilla extract
- 2 1/2 cups (300 g) powdered sugar, sifted
- 1/8 tsp fine salt
- 1 to 2 tbsp milk or heavy cream, as needed
Notes on the ingredients:
Buy real butter. This is one recipe where margarine or a soft tub spread genuinely doesn’t work — the higher water content in margarine is exactly the thing that pushes the emulsion toward soupy, which is the problem we’re spending this whole article avoiding.
Sift the powdered sugar if you can. Most bags settle during shipping and any lumps you beat in will still be visible, and you’ll taste them.
Equipment
- Stand mixer or electric hand mixer
- Medium mixing bowl
- Rubber spatula, for scraping down the bowl
- Fine mesh strainer
- Bench scraper (optional but very satisfying)
- Offset spatula or a butter knife, for spreading
- Wire cooling rack
Instructions
Make the pudding base, then give it ten minutes.
Whisk the banana pudding mix into the 1/2 cup of cold water with the vanilla. It’ll look thin and slightly gluey, which is correct. Leave it on the counter for 10 minutes, then stir once. This is instant pudding, so those ten minutes aren’t optional and they’re not about safety. The powder thickens through the same starch-gelatinizing process a cooked pudding goes through, just faster. If you skip the wait and pour the base into the butter while it’s still liquid, you’ll have a thinner frosting that starts pooling in the center of the cake within the hour.
Now check the butter before you beat anything.
This is the step that decides how the frosting turns out, and it’s the one people get wrong by an amount that feels too small to notice. You want the butter at 65 to 68°F. Cold, it won’t cream. Warm, it goes greasy. But “room temperature” on most kitchen counters is 70°F and climbing, and there’s a real difference between 68 and 72.
Here’s what those few degrees cost you. Butter is a structure of small crystals suspended in oil. Beat it while it’s cool and those crystals give you something solid to build air into, and you get a frosting that comes up light and matte and holds a soft ridge where you drag the spatula. Push past about 70°F and the crystals melt into the oil phase, the thing you were building air into has nothing to anchor to, and suddenly you have a frosting that looks fine right up until it looks faintly oily and starts sliding down the side of the cake. Practical version: cut the stick into cubes, leave them out 10 to 15 minutes, then press one. It should dent easily under your thumb and still feel slightly cool to the touch. Not giving a dent? Back in the fridge for 10 more minutes. Denting and feeling genuinely warm? Ice bath, five minutes. I made this frosting twice on the same cake, one batch off butter at 68 and one at 73, and handed them to two people without saying anything about the difference. Both picked the cooler one.
Cream the butter until it’s pale, then stop.
Beat the butter on medium-high for 2 to 3 minutes, scraping the bowl down twice, until it looks noticeably lighter in color and fluffy with a soft, dull surface rather than shiny. Scrape the bowl every 60 seconds or so. Frosting climbs the sides while you beat, and that butter sitting against the bowl wall is not getting aerated. Stop here. This is the other half of the temperature story — butter breaks down into grains and then goes oily somewhere around the five-minute mark, and once it does there’s no coming back. Pale and fluffy is the finish line, not glossy and fast.
Add the sugar in two additions, with the salt.
With the mixer on low, add about 1 1/2 cups of the sifted powdered sugar plus the salt. Let it come together, then add the rest. Low speed here, not medium. The powdered sugar will cloud up the bowl and you don’t want it aerosolizing all over your kitchen, and low speed gives the sugar time to hydrate instead of just flying around on top of the butter.
Turn it up and add the pudding base.
Beat on medium-high, adding the thickened banana pudding base a tablespoon at a time, until everything is smooth and glossy. Scrape once more. Now here’s the adjustment, and it’s the only other thing you’re really tuning: the frosting should be soft and spreadable. If it looks stiff and crumbly, add a tablespoon of milk. If it’s loosening and starting to drip off the spatula, add a tablespoon more powdered sugar. Stop while it still holds a peak. Frosting that looks a fraction too loose in the bowl spreads like a coating; frosting that’s a fraction too firm thins out as it hits a warm cake. Aim for the middle.
Chill it briefly, and frost a completely cold cake.
Pop the bowl in the fridge for 10 to 15 minutes. Cool butter plus a short chill gives you a frosting that holds its shape on the cake instead of relaxing into it. On the cake itself: let the layers cool in their pans for 20 minutes, then turn them out onto a rack and cool all the way to room temperature. Not just the top. The inside of a warm cake is warm for a long time and it’ll cut straight through the frosting and take crumb with it. Then spread, and don’t worry about making it perfect. This frosting smooths out beautifully with an offset spatula once it’s set.
Common Mistakes to Avoid
- Beating butter that’s at room temperature. This is the big one. Slightly warm butter gives you a frosting with no volume and a faint sheen, and it’s the single most common reason banana pudding frosting looks sad. Target 65 to 68°F, tested with a dent, not with the clock.
- Frosting a cake that isn’t fully cool. The frosting softens, slides, and tears the crumb off the top. Twenty minutes in the pan plus 30 minutes on a rack is the minimum.
- Adding the pudding base before it’s set. Instant pudding reaches its body in 10 minutes. Pour it in liquid and the frosting will be thin enough to pool in the middle of the cake.
- Beating the butter past pale. It looks like it’s still improving at four minutes and it’s already past the point. The frosting goes grainy, then greasy, and then it’s scrapable.
- Skipping the sift. Powdered sugar settles. Any lumps get beaten in and stay there, and you’ll find them with your tongue every time you eat the cake.
How to Store & Reheat
There’s no reheating. This gets stored.
Fridge: airtight, up to 5 days. It’ll come out hard, which is not a sign anything went wrong.
Room temperature: 2 hours is the honest limit, and 1 hour if it’s above 90°F. It’s a dairy frosting sitting out without refrigeration.
Before reusing: soften it for 20 minutes on the counter. If you’re impatient, 20 seconds in the microwave — and only 20. A minute in there re-melts the butter and undoes the entire point of step two, and you’ll be back to greasy frosting wondering what you did wrong.
For a neater job on a layer cake, frost it straight from the fridge as a thin crumb coat, chill 15 minutes, then add the final layer. It’s an extra step and it works.
Freezer: don’t. Pudding and powdered sugar frosting goes grainy and separates, and there’s no bringing it back.
Recipe Variations & Substitutions
- Chocolate version: Use chocolate pudding mix and add 2 tablespoons of cocoa powder. You’ll want a tablespoon less milk since cocoa absorbs it.
- Cream cheese version: Beat 4 oz softened cream cheese in with the butter before the sugar. Thinner, tangier, and better suited to layer cakes.
- More banana: Fold in half a very ripe mashed banana. Cook it down first in a small pan until it’s thick, otherwise you’ll add a lot of water and the frosting will soften. Note that this makes it noticeably more perishable — three days in the fridge instead of five.
- Malted banana bread version: Swap 1/2 cup of the powdered sugar for 2 tablespoons light brown sugar and add 1/4 tsp cinnamon. Tastes like the top of a loaf.
- Dairy-free: Vegan butter sticks work. Beat them 4 minutes instead of 2, since they soften differently and take longer to aerate, and check the same dent test — they hit the greasy window faster than dairy butter does.
- Salted butter: Go ahead, just leave out the 1/8 tsp of salt.
An Honest Read on the Numbers
This is butter and sugar. That’s not a criticism, it’s what a frosting is, and pretending otherwise would be silly — but you should know what you’re eating.
A two-tablespoon serving comes in around 150 calories, with essentially no protein, almost no fiber, and nearly all of the fat coming from a single stick of butter split sixteen ways. There’s nothing meaningful in there nutritionally, and the sugar-free pudding mix isn’t a clean workaround here — the frosting ends up needing extra powdered sugar to taste right, which cancels the saving.
The one swap actually worth knowing: replace half the powdered sugar with half a cup of mashed banana that’s been cooked down until thick. That cuts roughly 150 calories per serving and adds some fiber and potassium. It also makes it sweeter and more banana-forward, which some people prefer and some don’t.
FAQ
Why is my banana pudding frosting so thin?
Three causes, and they’re worth checking in order. Butter that was too warm is first — if the frosting has a sheen and holds almost no volume, that’s it. Pudding base that wasn’t given its full 10 minutes is second. Too much milk is third, and the easiest to fix. One tablespoon of powdered sugar at a time is usually all it takes.
Can I make this without the pudding mix?
Yes. Mashed ripe banana, butter, powdered sugar, and cream cheese makes a good frosting — it just behaves differently. It won’t hold a ridge as well, it browns slightly over a couple of days, and it’s better used straight from the bowl than layered and chilled. The pudding mix version is more forgiving.
Can I use salted butter?
Yes, and you won’t miss the added salt. Just leave out the 1/8 teaspoon. If you’re using salted butter, I’d skip the vanilla’s sweetness boost too and add a few extra drops.
How long does this frosting keep?
Five days covered in the fridge. Two hours is the limit at room temperature, an hour if it’s hot out. It will firm up substantially in the fridge — 20 minutes back out on the counter before you use it, and absolutely no more than 20 seconds in the microwave.
Is it gluten-free?
Yes, as written. Instant pudding powder, butter, powdered sugar, and milk have nothing wheat in them. Frost a gluten-free cake or a regular one. Worth noting that a few brands of pudding powder use wheat starch as a carrier, so check the ingredient list if it’s going on a cake that’s being made for someone avoiding gluten for medical reasons.
Can I frost the cake a day ahead?
You can, and for a layer cake it’s actually easier. Frost it, then refrigerate the cake covered. Take it out 30 to 45 minutes before serving so the frosting softens enough to cut cleanly instead of cracking. Don’t put it in the freezer to speed that up — the frosting will go grainy.
Final Thoughts
Five minutes, one bowl, and a ten-minute stand you can use to wash the pan. The only thing standing between this frosting and a greasy one is the temperature of the butter, and that’s a dent and a thumb rather than a thermometer.
Make it the next time the cake’s done and the frosting isn’t. Then tell me how you frost a cake crumb coat first and refrigerate it, or straight on in one pass? I’ve done both and I’ve changed my mind about it more than once.
- 1 stick 8 tbsp / 115 g unsalted butter, cut into 1-inch cubes
- 1 3.4-oz / 96 g box instant banana pudding mix
- 1/2 cup 120 ml cold water
- 1 tsp vanilla extract
- 2 1/2 cups 300 g powdered sugar, sifted
- 1/8 tsp fine salt
- 1 to 2 tbsp milk or heavy cream as needed
Stand mixer or electric hand mixer
Medium mixing bowl
Rubber spatula, for scraping down the bowl
Fine-mesh strainer
Bench scraper (optional but very satisfying)
Offset spatula or a butter knife, for spreading
Wire cooling rack
Whisk the banana pudding mix into the 1/2 cup of cold water with the vanilla. It’ll look thin and slightly gluey, which is correct. Leave it on the counter for 10 minutes, then stir once. This is instant pudding, so those ten minutes aren’t optional and they’re not about safety. The powder thickens through the same starch-gelatinizing process a cooked pudding goes through, just faster. If you skip the wait and pour the base into the butter while it’s still liquid, you’ll have a thinner frosting that starts pooling in the center of the cake within the hour.
This is the step that decides how the frosting turns out, and it’s the one people get wrong by an amount that feels too small to notice. You want the butter at 65 to 68°F. Cold, it won’t cream. Warm, it goes greasy. But “room temperature” on most kitchen counters is 70°F and climbing, and there’s a real difference between 68 and 72. Here’s what those few degrees cost you. Butter is a structure of small crystals suspended in oil. Beat it while it’s cool and those crystals give you something solid to build air into, and you get a frosting that comes up light and matte and holds a soft ridge where you drag the spatula. Push past about 70°F and the crystals melt into the oil phase, the thing you were building air into has nothing to anchor to, and suddenly you have a frosting that looks fine right up until it looks faintly oily and starts sliding down the side of the cake. Practical version: cut the stick into cubes, leave them out 10 to 15 minutes, then press one. It should dent easily under your thumb and still feel slightly cool to the touch. Not giving a dent? Back in the fridge for 10 more minutes. Denting and feeling genuinely warm? Ice bath, five minutes. I made this frosting twice on the same cake, one batch off butter at 68 and one at 73, and handed them to two people without saying anything about the difference. Both picked the cooler one.
Beat the butter on medium-high for 2 to 3 minutes, scraping the bowl down twice, until it looks noticeably lighter in color and fluffy with a soft, dull surface rather than shiny. Scrape the bowl every 60 seconds or so. Frosting climbs the sides while you beat, and that butter sitting against the bowl wall is not getting aerated. Stop here. This is the other half of the temperature story butter breaks down into grains and then goes oily somewhere around the five-minute mark, and once it does there’s no coming back. Pale and fluffy is the finish line, not glossy and fast.
With the mixer on low, add about 1 1/2 cups of the sifted powdered sugar plus the salt. Let it come together, then add the rest.Low speed here, not medium. The powdered sugar will cloud up the bowl and you don’t want it aerosolizing all over your kitchen, and low speed gives the sugar time to hydrate instead of just flying around on top of the butter.
Beat on medium-high, adding the thickened banana pudding base a tablespoon at a time, until everything is smooth and glossy. Scrape once more. Now here’s the adjustment, and it’s the only other thing you’re really tuning: the frosting should be soft and spreadable. If it looks stiff and crumbly, add a tablespoon of milk. If it’s loosening and starting to drip off the spatula, add a tablespoon more powdered sugar. Stop while it still holds a peak. Frosting that looks a fraction too loose in the bowl spreads like a coating; frosting that’s a fraction too firm thins out as it hits a warm cake. Aim for the middle.
Pop the bowl in the fridge for 10 to 15 minutes. Cool butter plus a short chill gives you a frosting that holds its shape on the cake instead of relaxing into it. On the cake itself: let the layers cool in their pans for 20 minutes, then turn them out onto a rack and cool all the way to room temperature. Not just the top. The inside of a warm cake is warm for a long time and it’ll cut straight through the frosting and take crumb with it. Then spread, and don’t worry about making it perfect. This frosting smooths out beautifully with an offset spatula once it’s set.
Easy 5-Minute Banana Pudding Frosting
Last modified: September 30, 2026