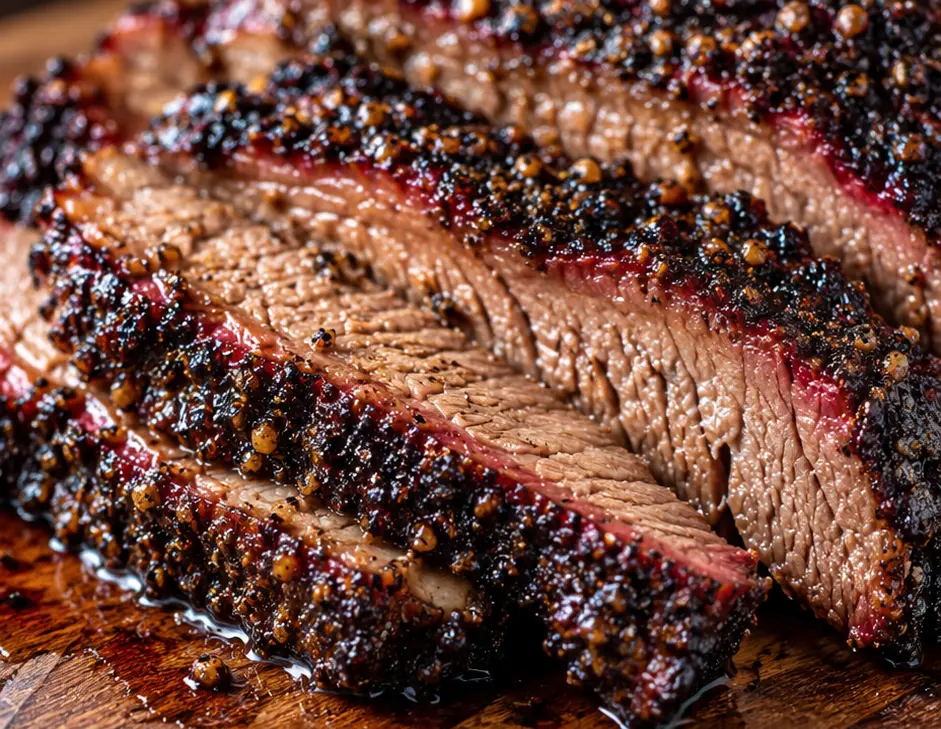
Somewhere around hour four, the kitchen stops smelling like “meat in the oven” and starts smelling like something you’d wait in line for peppery, deeply savory, a little smoky even without a drop of liquid smoke. That’s the brisket telling you the collagen is finally starting to break down.
Most people assume that kind of result needs a smoker and a backyard. It doesn’t. It needs time, a heavy hand with the crust, and one resting step almost everyone skips. Here’s how it comes together.
Why You’ll Love It
- No smoker, no wood chips, no weather-watching — just your oven and enough time to walk away.
- The extended rest is the real secret — wrapping the brisket and letting it sit for a full hour after baking is what pushes it from “good” to genuinely fall-apart tender, and most recipes cut this step short.
- A simple two-ingredient crust (salt and coarse pepper) lets the beef flavor lead instead of hiding behind a dozen spices.
- Feeds a crowd without needing a whole day tending a fire.
- Leftovers are arguably better than day one — the flavor keeps developing in the fridge.
- Budget-friendly for the amount of food you get, since brisket is one of the more affordable cuts per pound that can feed this many people.
Recipe At a Glance
- Prep time: 20 minutes (plus optional overnight salt rest)
- Cook time: 6–7 hours
- Total time: about 7.5 hours, plus a 1-hour rest
- Servings: 8–10
- Estimated calories: ~410 per serving (estimate; varies by trim and portion size)
- Estimated macros: ~38g protein, ~1g carbs, ~28g fat per serving
(Nutrition figures are estimates based on standard ingredient values, not a lab analysis — treat them as a general guide.)
Ingredients
- 5–6 lb whole beef brisket (flat cut, with a layer of fat left on)
- 3 tablespoons kosher salt
- 3 tablespoons coarse black pepper
- 1 tablespoon garlic powder
- 1 tablespoon smoked paprika
- 1 cup beef broth (for the baking pan, not the meat directly)
Ingredient notes: Ask your butcher for a flat cut with the fat cap intact trimmed-too-lean brisket dries out during a long bake since there’s nothing left to render and baste the meat as it cooks. Coarse, cracked black pepper (not fine-ground) is worth the extra step; it forms the craggy, dark crust that Texas-style brisket is known for, and pre-ground pepper just doesn’t hold up the same way over 6+ hours.
Equipment Needed
- Large roasting pan with a wire rack
- Aluminum foil or butcher paper
- Instant-read meat thermometer
- A cooler (optional, but genuinely useful for the resting step)
Step-by-Step Instructions
Step 1: Season the brisket:
Combine the salt, pepper, garlic powder, and smoked paprika in a small bowl. Pat the brisket completely dry with paper towels, then coat it generously on all sides with the rub, pressing it into the meat. Pro tip: if you have the time, do this the night before and leave the brisket uncovered in the fridge the salt has longer to penetrate the meat instead of just sitting on the surface.
Step 2: Preheat and set up the pan:
Preheat your oven to 275°F. Place the seasoned brisket fat-side up on a wire rack set inside a roasting pan, and pour the beef broth into the bottom of the pan (not over the meat) to keep the environment humid as it bakes.
Step 3: Bake low and slow:
Bake uncovered for about 5–6 hours, until the internal temperature reaches 165°F. Don’t be alarmed if the temperature seems to stall for an hour or more somewhere around 150°F that’s the collagen breaking down and moisture evaporating from the surface, and it will start climbing again on its own.
Step 4: Wrap it tightly:
Once it hits 165°F, remove the brisket from the oven and wrap it tightly in two layers of foil (or butcher paper, if you have it). Return it to the oven and continue baking until the internal temperature reaches 200–203°F, roughly another 1–2 hours.
Step 5: Rest wrapped for a full hour this is the step that matters most:
Pull the brisket from the oven still wrapped, and let it rest for a minimum of 45–60 minutes before slicing, ideally in a cooler with towels around it to hold the heat. This extended rest lets the juices redistribute through the whole cut instead of running out onto the cutting board the moment you slice it cutting into brisket right out of the oven is the single most common reason people end up with dry slices despite doing everything else right.
Step 6: Slice against the grain:
Unwrap the brisket and check the direction the muscle fibers run it can shift partway through a whole brisket. Slice against the grain in pieces about pencil-thickness for the most tender bite.
Common Mistakes to Avoid
- Slicing right after it comes out of the oven. Skipping the extended wrapped rest is the single biggest reason brisket turns out dry give it the full hour.
- Trimming off too much fat before cooking. The fat cap bastes the meat as it renders; a brisket trimmed too lean has nothing left to keep it moist over a long bake.
- Using fine-ground pepper instead of coarse. It burns faster and doesn’t build the same crust over a multi-hour bake.
- Panicking during the temperature stall. It’s a normal part of the process, not a sign something’s wrong resist the urge to crank the oven temperature to push through it.
- Slicing with the grain instead of against it. Even a perfectly cooked brisket will feel chewy if it’s cut the wrong direction.
How to Store & Reheat
Store leftover brisket in an airtight container in the fridge for up to 4 days, or freeze sliced portions for up to 3 months. Freezing it with a bit of the pan juices helps keep it from drying out later.
To reheat, place slices in a baking dish with a splash of beef broth, cover tightly with foil, and warm in a 300°F oven for 15–20 minutes. Avoid the microwave if you can it tends to toughen the meat fast, especially in thinner slices.
Recipe Variations & Substitutions
- Spicier crust: Add 1 tablespoon of cayenne or chili powder to the rub for a Texas-style kick.
- Gluten-free: This recipe is naturally gluten-free as written — just double-check your beef broth brand for hidden additives.
- Point cut instead of flat: The point has more marbling and works well here too, though it may finish slightly faster due to the extra fat content.
- Smoky flavor without a smoker: Add ½ teaspoon of liquid smoke to the rub if you want a closer approximation of a traditional smoked brisket flavor.
- Low-carb / keto friendly: As written, this recipe fits easily into a low-carb plan — just watch any sides you pair it with.
- Make-ahead for a crowd: Cook, wrap, and refrigerate the whole brisket a day ahead, then reheat sliced portions just before serving — many people find the flavor is even better on day two.
Nutritional & Health Angle
Brisket is a good source of protein and iron, and this recipe keeps the ingredient list simple — salt, pepper, and aromatics — rather than leaning on a sugar-heavy glaze or sauce for flavor. Trimming visible fat before serving is an easy way to lighten individual portions if that matters to you. This isn’t formulated as a health food, just a straightforward, ingredient-honest version of a classic.
FAQ
Can I use a smaller brisket for this recipe?
Yes — a 3–4 lb brisket will cook faster, generally closer to 4–5 hours before wrapping, so start checking internal temperature earlier than the times listed here.
Do I really need to rest it for a full hour?
It makes a noticeable difference. A shorter 15–20 minute rest is better than nothing, but the full 45–60 minutes is what really lets the juices redistribute evenly through the meat.
Can I skip the wrapping step?
You can, but the brisket will likely take longer to push past the temperature stall and may dry out slightly more on the surface — wrapping helps it push through faster while staying moist.
What if I don’t have a wire rack for the roasting pan?
You can set the brisket directly on a bed of sliced onions in the pan instead, which keeps it elevated slightly out of the liquid and adds flavor as a bonus.
Is this recipe gluten-free?
Yes, as written it’s naturally gluten-free just check your specific beef broth brand, since some varieties include gluten-containing additives.
Can I make this in a slow cooker instead?
You can, though you’ll lose the dry, peppery crust that the oven method builds — if crust matters to you, finish a slow-cooked brisket under the broiler for a few minutes before resting.
Final Thoughts
The rub and the bake time do a lot of the work here, but it’s really that full hour of resting, wrapped and undisturbed, that turns a good brisket into one that falls apart at the fork. It takes patience more than skill, and it’s worth the wait.
Which variation are you trying first the spicy crust, or keeping it classic?
- 5–6 lb whole beef brisket (flat cut, with a layer of fat left on)
- 3 tablespoons kosher salt
- 3 tablespoons coarse black pepper
- 1 tablespoon garlic powder
- 1 tablespoon smoked paprika
- 1 cup beef broth for the baking pan, not the meat directly
Large roasting pan with a wire rack
Aluminum foil or butcher paper
Instant-read meat thermometer
A cooler (optional, but genuinely useful for the resting step)
Season the brisket: Combine the salt, pepper, garlic powder, and smoked paprika in a small bowl. Pat the brisket completely dry with paper towels, then coat it generously on all sides with the rub, pressing it into the meat. Pro tip: if you have the time, do this the night before and leave the brisket uncovered in the fridge — the salt has longer to penetrate the meat instead of just sitting on the surface.
Preheat and set up the pan: Preheat your oven to 275°F. Place the seasoned brisket fat-side up on a wire rack set inside a roasting pan, and pour the beef broth into the bottom of the pan (not over the meat) to keep the environment humid as it bakes.
Bake low and slow: Bake uncovered for about 5–6 hours, until the internal temperature reaches 165°F. Don't be alarmed if the temperature seems to stall for an hour or more somewhere around 150°F that's the collagen breaking down and moisture evaporating from the surface, and it will start climbing again on its own.
Wrap it tightly: Once it hits 165°F, remove the brisket from the oven and wrap it tightly in two layers of foil (or butcher paper, if you have it). Return it to the oven and continue baking until the internal temperature reaches 200–203°F, roughly another 1–2 hours.
Rest wrapped for a full hour this is the step that matters most: Pull the brisket from the oven still wrapped, and let it rest for a minimum of 45–60 minutes before slicing, ideally in a cooler with towels around it to hold the heat. This extended rest lets the juices redistribute through the whole cut instead of running out onto the cutting board the moment you slice it cutting into brisket right out of the oven is the single most common reason people end up with dry slices despite doing everything else right.
Slice against the grain: Unwrap the brisket and check the direction the muscle fibers run it can shift partway through a whole brisket. Slice against the grain in pieces about pencil-thickness for the most tender bite.
Last modified: September 8, 2026